How To Clean Your Pet’s Ears
Step 1: Desensitize your pet to having their ears touched
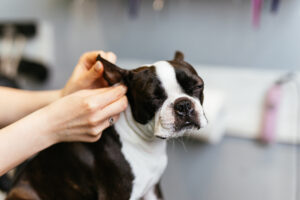
Although this may not seem like an important step, playing with your pet’s ears and frequently touching them will get your dog/cat used to having their ears touched. This makes future cleanings a lot easier!
Step 2: Evaluate your pet’s temperament
If your pet’s ears are very painful and look infected or they don’t like their ears being touched at all, do NOT proceed! Call the clinic and leave a message for your veterinarian.
Step 3: Get your ear cleaner ready
Fill the ear canal with cleaner until it overflows, then rub at the base of the ear. This will help break up any debris that is deeper in the ear canal. You cannot put too much cleaner in the ear.
Your veterinarian may ask that you saturate cotton balls with cleaner and squeeze these into the ear canal instead of pouring the cleaner directly into the ear. This is often times easier for patients that have sensitive ears!
Step 4: Allow your pet to shake their head
This will help bring up any cleaner and debris that is stuck deep in the ear canal.
Step 5: Wipe the ears
Roll a cotton ball between your hands to elongate, then gently wipe the inside of the ear canal. Use as many as you need until the ears are clean. You can also use Q-Tips to get in the outer crevices that are hard to reach but do not insert into the ear canal.
Step 6: Repeat with the other ear
Repeat Steps 1-5 with the other ear!
Step 7: Wait 10 minutes to medicate
If your veterinarian sent you home with medicated ear drops or a solution, wait 10 minutes after cleanings to allow the ears to dry before medicating. If you are directed to clean your pet’s ears prior to medicating, always clean FIRST.
***Remember to always clean your pet’s ears as directed by your veterinarian. For maintenance, it is recommended to clean the ears every 1-2 weeks as needed or after bathing, grooming, or swimming.***